Thursday, August 04, 2011

Tuesday's Card Class

Well it's a new week, and you know what that means...a new class to prepare for.  In keeping with using stamp sets from our summer mini (which will be expiring at the end of this month), I chose to use the set, On The Grow, and this is the card we ended up doing:

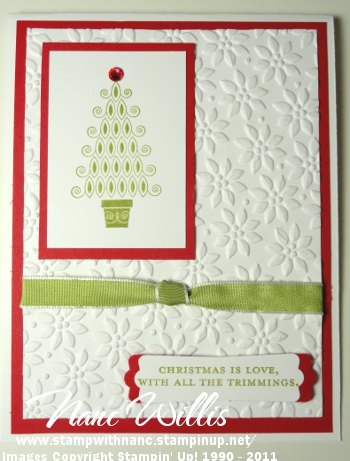
Tuesday's Card - On the Grow

The vase and flowers were done on watercolor paper using our watercolor wonder crayons.  I used a recently retired DSP, that I thought looked great with the colors that were used.  The original card was cased from Splitcoast Stampers by a demonstrator named Diana Gibbs.  Isn't it beautiful!
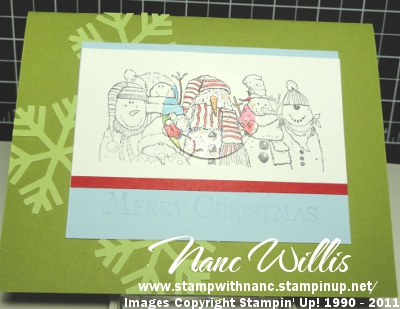
Our Christmas card this week used the Holiday Line Up set, and when I was trying to come up with a card for the class, I didn't like the one I first did...
First Attempt

but I knew I wanted to use this set and that I wanted to show my ladies the spotlight technique.  So I went back to the drawing board and this is what I came up with instead...

Second Attempt at Christmas Card

I liked the color combination much better...not only did we color in the little tag for the spotlight technique, I had them add glitter to the snowmen.  I don't think one of us left there without some glitter on us somewhere!  Here's a close up of the tag so that you can better see what I'm talking about:

Close up of tag from Christmas card

My next project this week was a card for my Mom.  I'm going to hold off posting about it until she sees it...don't want to spoil the surprise for her.

Until next time...happy stampin'!

Saturday's Downline Meeting

With the summer months upon us, there were just a few of us there at the down line meeting this past Saturday, which is alright, because sometimes you're able to get more done with less people there...but they were still missed just the same.  When we got there, Susan had placed these sweet little nail file holders at each of our work stations...aren't they cute?
Nail file and holder from Susan

She always does the nicest things for us!  I don't think all demonstrators are as lucky as we are.  Anyway, we all chit-chatted for a while and got caught up with each other and then we exchanged swaps.  The swaps I brought used the embossed resist technique that I showed you in my last post (click here if you missed it), but they were a little different in that some were fully sponged, and some were partially sponged.

Swaps for Saturday's meeting


Close up of swap fully sponged

Close up of swap partially sponged

After we exchanged our swaps, we worked on this month's project, 3 x 3 cards.  I have been trying to include 3 x 3 thank you notes in with my local order deliveries, and sometimes it's a challenge to come up with a new design, so this was very helpful to me.  We made eight in all.  And would you believe that out of those eight, I only have all the supplies to make three of them...guess I'll be placing an order for some of those that I really liked!  Here are the eight we made, hope you like them too.

3 x 3 Thank You Notes

After we got these done and said our good-byes, I headed home and was able to coax my DH to hang up something for me.  I'm going to call it a ribbon rod...but what it really is, is a curtain closer rod from Ikea. 


I got the idea from Mary Fish, and a dear friend of mine, Joyce, was heading to Ikea recently (it's about 45 minutes away from here, so I was grateful that she was going to save me the trip!), and I asked her to pick me up one while she was there and that I would pay her for it when I saw her at our next class.  Well that little sweetie, picked it and the brackets up for me, but she wouldn't let me pay her for it...she wouldn't hear of it!  Thank you Joyce, I love it (and you)!  Would you believe it doesn't hold all of my ribbon...this is just my retired and misc. stuff...looks like I'll be getting another one for the current ribbon!  Ikea here I come!!


So what have I been doing lately?

So what have I been up to lately?  Making cards, of course!  Last week for my Tuesday class we did these two cards:

Travel Log card for Tuesday class

And this one:

Tuesday Card Class Christmas Card


The Travel Log card was one I CASED from a card I found on our demo exclusive web site, made by a fellow demonstrator, Candy Rattray.  The second card was also CASED, but this time it was from closer to home.  When I was visiting my up line, I saw a card laying on her table, that I thought was just gorgeous.  She said that one of our fellow demonstrators, Phyllis Curling had done it.  I told her that I just had to make one too...it was so pretty!  In making mine, I changed a couple of things, but most of the elements remained the same.  One thing I did change was the color of the rhinestone, as seen here:

Close up of rhinestone

I saw a great tip on Mary Fish's blog about being able to color the rhinestones with sharpies...pretty cool, huh?  You just take any color sharpie, and because they are permanent, you can color right on your rhinestone without worrying that the color will rub off.

I also made a card for my cousin's birthday...

Birthday Card for Sammy

The medallion stamp is a great go-to for a masculine card.  In fact, I've used it a few times for some of the guys in my family.  This time I did something a little different though.  I stamped with Versamark on designer paper, embossed with clear embossing powder and then sponged over it, allowing the designer paper to show through.  This technique is called emboss resist.  Here's a close up of it so that you can see it a little better I hope:

Emboss Resist Close Up

It's a really cool effect.  In fact, I liked it so much, I used this same technique for my down line meeting swaps on Saturday.  I'll show you those and some of the things we did at the meeting in my next post.